
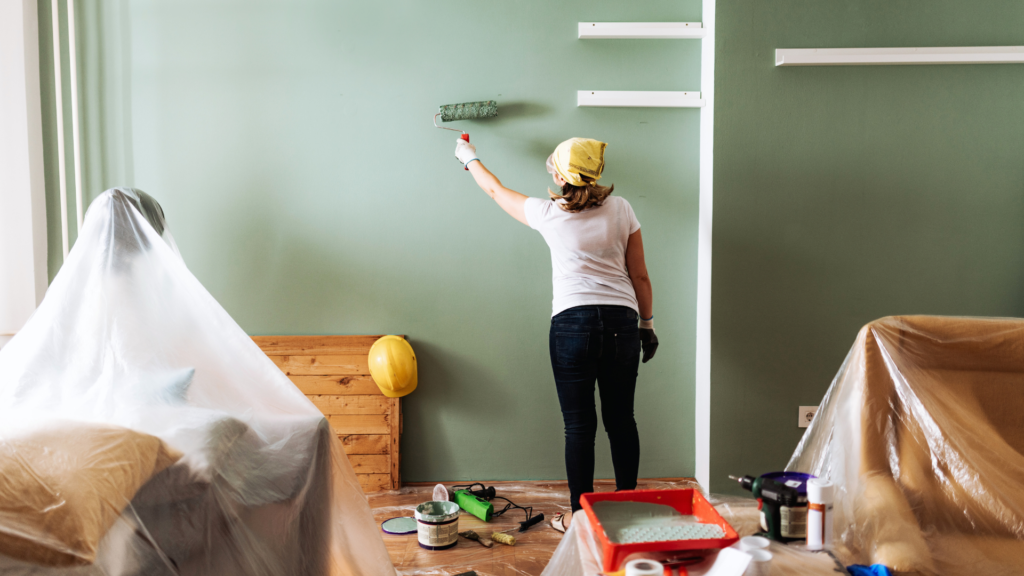
Improving your home doesn’t have to drain your savings. Budget-friendly home improvement ideas focus on simple, affordable changes that boost your space’s value and comfort without costly renovations. Small updates like painting, upgrading fixtures, or adding storage can make a big difference.
Knowing where to invest your time and money is key to effective home improvement on a budget. These projects not only enhance aesthetics but also improve functionality, making your home more enjoyable day to day.
This guide covers practical, low-cost ideas that fit various styles and needs. Whether you rent or own, these tips offer straightforward ways to refresh your space without overspending.
Planning Your Budget-Friendly Home Improvement Project
Successful home improvement starts with clear intentions, smart budgeting, and finding cost-effective materials. Knowing exactly what you want to achieve keeps spending in check. Careful planning prevents unexpected expenses and ensures every dollar is well used.
Setting Priorities and Goals
Identify the most urgent repairs or upgrades first. Focus on improvements that boost functionality or increase property value, such as fixing leaky faucets or updating outdated fixtures. List what needs the most attention and rank by importance.
Define tangible goals for each task—whether it’s improving energy efficiency or enhancing curb appeal. Clear goals help avoid impulse spending. Separate necessary fixes from aesthetic updates to allocate funds wisely.
Maintain flexibility, but keep your priorities clear. Adjust your plan if costs rise, but avoid straying from essential improvements.
Creating a Renovation Budget
Start by estimating all costs: materials, labor, permits, and unexpected expenses. Use spreadsheets or budgeting apps to track expenses.
Include a contingency of 10-15% for surprises like hidden damage. This cushioning reduces stress during the project.
Break down the budget by tasks, e.g., painting $300, flooring $500. This control lets you adjust spending if needed.
If hiring professionals, get multiple quotes to compare prices. For DIY, calculate tool rentals and material amounts carefully to avoid waste.
Researching Affordable Materials
Compare prices at local stores, online vendors, and discount outlets. Bulk buying can reduce costs for paint, tiles, or lumber.
Consider alternative materials like laminate instead of hardwood or vinyl plank flooring instead of tile. These often offer good durability at lower prices.
Look for sales, clearance items, and recycled materials. Salvage yards and habitat stores can provide budget-friendly options with character.
Read reviews to ensure quality isn’t sacrificed for price. Lower cost should not mean frequent replacement or repair.
Affordable Interior Upgrades
Simple changes can significantly improve the look and feel of your home without a high cost. Updating colors, lighting, and wall treatments can refresh rooms quickly and effectively.
Painting Walls and Ceilings
Painting is one of the most cost-effective interior upgrades. Choosing neutral or light tones can make spaces feel larger and brighter. Invest in quality paint and proper tools to ensure an even finish and better durability.
Prep work is key. Clean surfaces, fill holes, and sand rough spots before you start. For ceilings, flat or matte white paint reduces glare and hides imperfections better than glossy finishes. Use painter’s tape to create sharp lines along trim and edges.
Painting can be a weekend project and often requires no professional help. This upgrade adds value by improving aesthetics and protecting surfaces from wear.
Modernizing Light Fixtures
Replacing outdated light fixtures can transform a room’s ambiance and functionality. Focus on fixtures that provide good illumination while matching the room’s style. LED fixtures are energy-efficient and have a longer lifespan.
Consider installing dimmer switches to control brightness according to the mood or time of day. Pendant lights work well in kitchens and dining areas, while flush mounts suit bedrooms and hallways.
Before installation, turn off the power to avoid electrical hazards. Many fixtures come with clear instructions or online videos, making DIY updates manageable.
Installing Peel and Stick Wallpaper
Peel-and-stick wallpaper offers an easy, damage-free way to add pattern and texture. It requires no paste or water, which simplifies application and cleanup. This option is ideal for renters or those testing new styles.
Measure walls accurately and work from top to bottom, smoothing bubbles with a plastic card or squeegee as you go. Patterns should align carefully to avoid a mismatched look. Choose durable vinyl-backed wallpapers for moisture-prone areas like kitchens or bathrooms.
Removal is straightforward and won’t leave a sticky residue, preserving the underlying surface. This upgrade provides a bold update without the cost and mess of traditional wallpapering.
Low-Cost Kitchen Updates
Simple upgrades can significantly refresh a kitchen’s appearance without large expenses. Small changes offer noticeable impact on both style and functionality.
Refinishing Cabinets
Refinishing cabinets involves sanding, priming, and painting or staining existing cabinet surfaces. This method saves money by avoiding cabinet replacements while giving a fresh, clean look. Choose paint or stain colors that complement your kitchen’s lighting and overall style.
Proper preparation is critical. Remove all hardware and thoroughly clean surfaces to ensure paint adhesion. Use a high-quality primer made for wood to prevent peeling. Finish with a durable topcoat tailored to kitchen environments, such as semi-gloss or satin.
This approach typically costs between $50 and $200 per cabinet door, depending on materials. It’s a practical option for outdated cabinets that are structurally sound but visually worn.
Upgrading Cabinet Hardware
Replacing cabinet hardware is one of the fastest and most affordable updates. New knobs and pulls can modernize the kitchen’s look instantly. Focus on choosing handles that fit existing holes to avoid extra drilling or repairs.
Material and finish variety includes brushed nickel, oil-rubbed bronze, chrome, and matte black. Matching hardware style with your kitchen theme improves cohesion—sleek bars suit modern kitchens, while antique knobs better match traditional designs.
Prices generally range from $2 to $15 per piece. Even a complete hardware change can cost under $100, making this a budget-friendly, high-impact option.
Adding Backsplashes
Installing a backsplash protects kitchen walls and enhances visual appeal. Peel-and-stick tiles and vinyl options offer affordable, easy-to-install alternatives to ceramic or glass tiles.
Common materials include subway tiles, mosaic patterns, or simple geometric shapes. Use waterproof adhesive and ensure the surface is clean and dry for best results. Peel-and-stick backsplashes typically require minimal tools and no grout application.
Costs vary but generally range from $10 to $30 per square foot. These options can be installed in an afternoon, providing a practical and stylish update without professional help.
Budget-Friendly Bathroom Improvements
Small, targeted updates can refresh the look of a bathroom without a large budget. Focusing on key elements like fixtures, caulking, and mirrors often delivers immediate visual improvements and enhanced functionality.
Replacing Fixtures and Faucets
Upgrading showerheads, faucets, and cabinet handles is one of the most cost-effective ways to modernize a bathroom. Choose water-saving fixtures to reduce utility bills while improving appearance.
Installation typically requires basic tools and minimal plumbing knowledge, making it a doable DIY task. Select finishes like brushed nickel or matte black for a contemporary style that resists fingerprints and water spots.
Budget options often start around $20-$50 per fixture. Plan replacements in sets for a coordinated look, for example, matching sink faucet and showerhead finishes.
Applying Fresh Caulk and Grout
Old, cracked, or discolored caulk and grout can make even a clean bathroom look neglected. Removing and reapplying them restores a crisp, fresh seal around tubs, sinks, and tile joints.
Use a silicone caulk designed for bathrooms that resists mold and mildew. For grout, choose a color that matches existing tiles or pick a contrasting color to create a design feature.
Tools needed include a caulk remover, a caulking gun, a grout float, and a sponge. Preparation involves cleaning and drying surfaces thoroughly to ensure adhesion.
Installing New Mirrors
Replacing an outdated or plain mirror instantly changes the bathroom’s focal point. Consider framed mirrors or those with built-in LED lighting for added style and function.
Standard sizes are easy to find and typically less expensive than custom cuts. Use mirror adhesive or mirror mounting clips for simple installation on drywall.
A larger mirror can also improve lighting and make a small bathroom feel bigger. If wall space allows, a stylish medicine cabinet mirror adds storage without extra cost.
Inexpensive Flooring Solutions
Affordable flooring options can dramatically change a room’s look without high costs or complicated installation. Several practical methods offer durability, style, and ease of maintenance suitable for different spaces.
Using Vinyl Plank Flooring
Vinyl plank flooring mimics the look of hardwood at a fraction of the price. It’s water-resistant, making it ideal for kitchens, bathrooms, and basements. Most vinyl planks feature a click-lock design, so installation is often a straightforward DIY project.
Choose vinyl with a textured surface to replicate wood grain and increase slip resistance. Pricing varies, but basic options start around $1 to $3 per square foot. This material is also low maintenance — just regular sweeping and occasional mopping keep it in good shape.
Refreshing Tile with Paint
Tile floors don’t require replacement to change their appearance. Specialized tile paint can rejuvenate worn or outdated surfaces cheaply. Preparation is key: tiles must be cleaned thoroughly and sanded if glossy for better paint adhesion.
Use paint formulated for floors and tiles, often epoxy- or enamel-based for durability. Applying a primer before painting ensures longer-lasting results. Expect the process to take a few hours plus drying time, but it can transform the look of ceramic or porcelain tiles without the mess of demolition.
Adding Area Rugs
Area rugs provide an instant facelift and can cover less attractive flooring without permanent changes. They come in a variety of styles, sizes, and price points—starting as low as $20 for smaller synthetic options.
Rugs add warmth, sound absorption, and comfort underfoot. Layering rugs can also introduce patterns and texture, enhancing a room’s design. For high-traffic areas, choose rugs with durable fibers like nylon or polypropylene to maintain their appearance longer.
Curb Appeal Enhancements on a Budget
Small updates can make a significant difference in your home’s exterior. Simple changes like refreshing colors, adjusting lighting, and improving landscaping manage cost while boosting visual appeal.
Painting the Front Door
Painting the front door is one of the most cost-effective ways to improve curb appeal. Choose a bold color that complements your house’s exterior. Proper surface preparation, such as sanding and cleaning, ensures the paint adheres well and lasts longer.
Invest in exterior-grade paint for durability. Use a high-quality brush or roller to avoid streaks and uneven coverage. Two coats usually provide the best finish. Adding a fresh coat of paint instantly upgrades the entrance and invites a welcoming feeling without a large expense.
Upgrading Outdoor Lighting
Outdoor lighting enhances safety and highlights architectural features after dark. Replace dim or outdated fixtures with energy-efficient LED lights that reduce electricity bills. Solar-powered options are affordable and easy to install, requiring no wiring.
Strategically place lights along walkways, near the door, and around landscaping to create balanced illumination. Motion sensors add security and convenience by activating lights only when needed. Proper outdoor lighting refreshes the home’s look and increases usability at night.
DIY Landscaping Projects
Landscaping boosts curb appeal through greenery and structural elements. Start by weeding and mulching existing beds to tidy the yard instantly. Adding inexpensive shrubs and seasonal flowers improves color and texture.
Consider simple projects like planting a border along the driveway or installing stone edging for definition. Raised garden beds or container gardening can add visual interest without a large footprint. Basic tools and local nursery plants keep the budget controlled while increasing curb appeal effectively.
Energy Efficient Home Improvements
Improving your home’s energy efficiency can reduce utility bills and increase comfort. Simple tasks like preventing air leaks, upgrading lighting, and sealing drafts greatly impact overall energy use.
Weatherstripping Doors and Windows
Weatherstripping involves applying seals to gaps around doors and windows to block air leaks. It is one of the most cost-effective ways to prevent warm or cool air from escaping, which stabilizes indoor temperatures.
Materials vary, including foam tape, felt, and vinyl strips. Foam tape is easy to install and best for irregular gaps, while vinyl works well on tight-fitting doors. Measure gaps carefully before buying materials.
Apply weatherstripping along door jambs, window sashes, and bottoms. Replace old or compressed strips to maintain effectiveness. This reduces the stress on heating and cooling systems, saving money over time.
Installing LED Bulbs
Switching to LED bulbs is a straightforward energy-saving measure. LEDs use about 75% less energy than incandescent bulbs and last up to 25 times longer.
Choose bulbs with the right brightness (measured in lumens) and color temperature for each room. Warm white (2700K–3000K) suits living spaces, while daylight (5000K–6500K) is better for task areas.
Installation is as simple as they fit standard sockets. Though LEDs may have a higher upfront cost, the energy savings pay off in under two years in most cases.
Sealing Drafts
Drafts often occur in places like attic hatches, baseboards, and around vents. Use caulk or expanding foam to seal gaps larger than a quarter inch.
For smaller cracks, apply silicone or acrylic-latex caulk. Clean areas before sealing to ensure good adhesion. During colder months, drafts increase heating costs and reduce comfort.
Focus on areas with significant airflow to make the most impact. Sealing drafts enhances insulation performance and reduces energy waste, directly lowering heating and cooling demands.
Repurposing and Upcycling for Home Decor
Using existing items in new ways can add character to your home without high costs. Simple projects like repainting furniture, making your own wall art, or finding secondhand items can refresh your space efficiently and affordably.
Transforming Furniture with Paint
Painting old furniture can dramatically change its appearance at a low cost. Start with sanding surfaces to ensure the paint adheres properly. Use chalk paint for a matte, vintage look or spray paint for smoother finishes.
Try bold colors on chairs or tables to create focal points. Adding stencils or layering paint with a distressing technique can add texture and depth. Sealing the paint with a clear coat protects the finish from wear.
This process requires minimal tools: sandpaper, paint brushes, and paint are often enough. It’s a good way to refresh thrifted or inherited pieces without needing upholstery or complex repairs.
Creating DIY Wall Art
DIY wall art can be made from inexpensive materials you already have. Frame fabric scraps, create geometric shapes with washi tape, or make printed photo collages. These pieces reflect personal taste without the cost of gallery art.
Use reclaimed wood or canvases as bases. Paint abstract patterns or arrange pressed flowers for a natural touch. You can also repurpose old magazines or wrapping paper for colorful designs.
Simple tools like glue, scissors, and frames are all you need. Changing wall art periodically keeps interiors fresh and personalized with minimal expense.
Utilizing Secondhand Finds
Secondhand stores, flea markets, and online marketplaces are rich sources for unique home decor. Look for items that need light cleaning or minor fixes and envision how they could fit your style.
Repurpose glass jars as vases or storage, turn vintage trays into serving platters, or salvage parts of broken furniture for shelves. Sometimes a new purpose can transform an overlooked object.
Keep an eye out for quality materials such as solid wood or brass that last longer. Cleaning and small repairs can elevate these finds quickly without spending much.
Smart Storage Solutions on a Budget
Effective storage can transform cluttered spaces without requiring a large investment. Simple modifications often make the most impact, using existing walls, reorganizing closets, and choosing versatile furniture.
Installing Floating Shelves
Floating shelves are a cost-effective way to add storage while keeping floors clear. They can be mounted on walls in kitchens, living rooms, or bathrooms to hold books, decor, or toiletries.
Choose shelves made from affordable materials like plywood or MDF, and install sturdy brackets to support weight. Position them strategically—above desks, beds, or door frames—to maximize vertical space.
Paint or stain shelves to match the room decor. Floating shelves also allow easy customization to fit odd spaces and help create an organized, open look.
Maximizing Closet Organization
Closets often have unused vertical space and corners. Adding adjustable shelving units, hanging organizers, or double rods can increase capacity without major renovations.
Use slim hangers and storage bins to free floor space. Label bins to speed up finding items. Installing hooks on the inside of closet doors also adds accessible storage for accessories or cleaning tools.
A well-planned closet setup reduces clutter and saves time. Focus on zones—for example, shoes on lower shelves, shirts hanging above, and seasonal items stored up high.
Utilizing Multi-Purpose Furniture
Furniture that serves more than one function saves space and money. Items like ottomans with hidden compartments, beds with built-in drawers, or fold-out desks provide both usability and storage.
Select pieces made from durable materials to avoid replacement costs. Multi-purpose furniture works best in small rooms where space is limited and needs to be flexible.
Including storage inside regular furniture keeps items out of sight, maintaining a clean, efficient look in the home. Look for options that complement your existing style without requiring additional décor changes.
Maintaining and Protecting Your Affordable Upgrades
Regular care ensures that budget-friendly improvements last longer and stay functional. Simple cleaning and routine inspections can prevent minor issues from becoming costly repairs.
Use appropriate cleaning tools for each surface. For example, soft cloths work well on painted walls, while a gentle brush helps maintain grout lines. Avoid harsh chemicals that can damage finishes or materials.
Protect upgrades by addressing wear and tear early. Tighten loose screws on shelves or furniture, touch up chipped paint, and reseal edges on countertops to keep them looking new.
A maintenance checklist can help you stay organized:
| Task | Frequency | Notes |
| Inspect for damage | Monthly | Look for cracks, leaks, etc. |
| Clean surfaces | Weekly | Use recommended methods |
| Touch-up paint | As needed | Prevent peeling or fading |
| Seal joints/edges | Annually | Prevent moisture damage |
Use furniture pads and area rugs to protect flooring and reduce scratches. This simple step minimizes wear without added expense.
Being proactive about upkeep saves money in the long run. Spend a few minutes regularly, and affordable upgrades will continue to enhance your home effectively.