
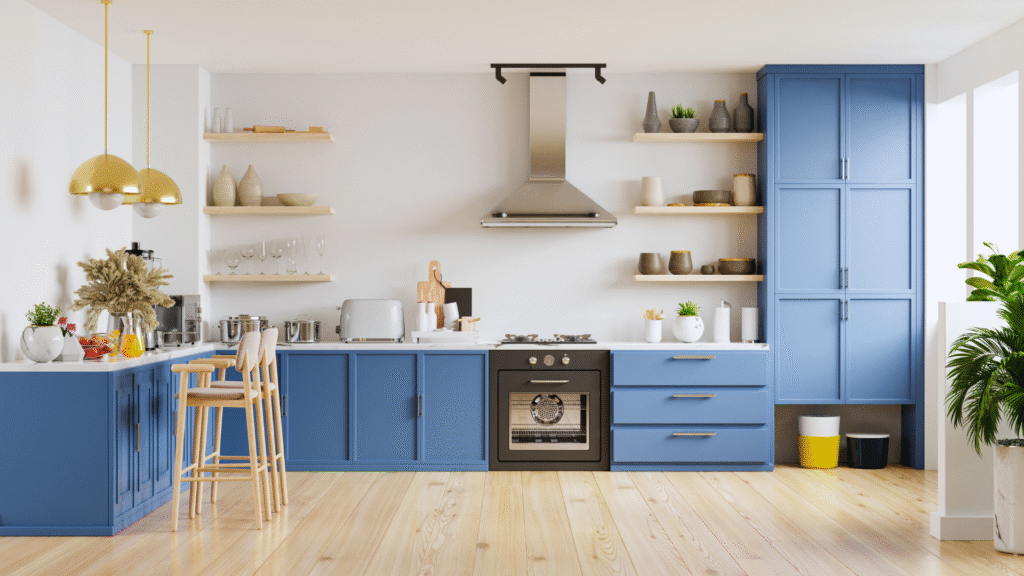
Revamping kitchen cabinets can completely transform the heart of the home without a major renovation. By choosing the right paint and following a systematic approach, anyone can achieve that fresh new look easily. This project not only enhances aesthetics but can also add value to the home.
The process requires careful planning and essential materials. From selecting the best type of paint to preparing the surfaces, each step matters for achieving a professional finish. That said, painting or refinishing cabinets can sometimes be more challenging than expected, especially if the surfaces are worn, uneven, or require specialized finishes. In such cases, custom cabinets from reputable providers like Lovech or other trusted companies allow you to choose materials, finishes, and sizes that fit your space perfectly, delivering a professional, long-lasting result without the stress of a complex DIY project.
For those ready to take on the DIY route, careful planning and preparation are essential. Selecting the right paint, properly preparing surfaces, and following a systematic process can make the project both manageable and rewarding. By combining smart techniques with quality materials or choosing professional-grade custom cabinets when necessary, you can create a kitchen that feels modern, inviting, and completely refreshed. The tips and tricks shared in this article can help ensure a successful outcome for anyone tackling the project.
Preparing Kitchen Cabinets for Painting
Prior to painting, proper preparation of the kitchen cabinets is essential for achieving a professional finish. This involves cleaning, detaching hardware, and smoothing surfaces to ensure that paint adheres well and lasts longer.
Cleaning and Removing Grease
Cabinets in the kitchen often accumulate grease and dirt over time. A thorough cleaning process is crucial.
Start by mixing a solution of warm water and dish soap. Using a sponge or cloth, scrub the surfaces of the cabinet doors and frames. For persistent grease, a mixture of vinegar and water can be more effective.
After cleaning, wipe down the surfaces with a tack cloth to remove any dust or residue. Ensuring cabinets are completely dry before proceeding is important. This prepares the surface for painting and helps prevent peeling later.
Detaching Cabinet Doors and Hardware
Removing cabinet doors and hardware is a necessary step for effective painting. This not only allows for easier access to all surfaces but also ensures a higher-quality finish.
Begin by unscrewing the cabinet doors from their hinges. Use a screwdriver and be sure to keep screws in a safe place to avoid misplacing them.
Next, carefully detach any drawer pulls, knobs, or other hardware. It may be useful to label each door and its corresponding hardware for easy reassembly. This organization helps reduce frustration during the final phase of your kitchen remodel.
Sanding and Surface Smoothing
Sanding is a critical part of preparing kitchen cabinets for paint. It creates a rough surface for better paint adhesion.
An electric sander can speed up this process, especially on larger areas. For corners and detailed areas, a sanding block or manual sandpaper is more effective.
Start with a medium grit sandpaper (around 120-grit) to remove the old finish. Follow up with a fine grit (around 220-grit) to smooth the surface. After sanding, wipe the cabinets with a tack cloth to remove dust. Properly prepared surfaces lead to a more durable finish.
Choosing the Best Materials and Tools
Selecting high-quality materials and tools is essential for achieving a professional finish when painting kitchen cabinets. The right paint and primer can significantly affect durability and appearance. Additionally, proper brushes and rollers ensure smooth application, minimizing the risk of imperfections.
Selecting Paint Types
For kitchen cabinets, choosing the right paint is crucial. Latex paint is commonly recommended due to its durability, quick drying time, and easy cleanup. It offers a lower odor compared to oil-based options. However, oil-based paint provides a more robust finish and is often used for high-traffic areas. If durability is a priority, oil-based paint may be a better option.
To differentiate, consider the following:
- Latex Paint: Fast drying, easy to work with, less fumes.
- Oil-Based Paint: Stronger finish, better for wear and tear, requires solvents for cleanup.
Kitchens benefit from satin or semi-gloss finishes. Both options offer good washability and sheen, making them practical choices.
Picking the Ideal Primer
A quality primer lays the foundation for a smooth finish. It enhances paint adhesion and helps cover any stains or colors underneath. For cabinets, a high-quality primer—either oil-based or a specially formulated latex version—works best to ensure longevity.
Key factors to think about when selecting a primer include:
- Stain-blocking ability
- Quick-dry options for efficiency
- Compatibility with the chosen paint
Restoring cabinets often requires a high-build primer, which helps create a smooth surface for the paint. Brands like Zinsser and Kilz are common choices available at outlets like Home Depot.
Essential Brushes and Rollers
Using the right application tools will enhance the painting process. A foam paint roller is ideal for flat surfaces, providing a smooth finish with minimal texture. It helps cover larger areas efficiently.
For detailed work, paint brushes are essential. Select brushes with synthetic bristles for latex paint or natural bristles for oil-based paints. Here are some recommendations:
- 2- to 2.5-inch angled brush: Perfect for edges and corners.
- 1-inch flat brush: Useful for detailed areas or touch-ups.
Investing in quality tools leads to better results. Regularly cleaning brushes and rollers ensures they last longer and perform well throughout the project.
Step-by-Step Guide to Painting Cabinets
Successful cabinet painting requires careful preparation and technique. Proper priming, even paint application, and ensuring smooth drying will yield the best results.
Priming Kitchen Cabinets
Priming is essential for achieving an even finish on painted cabinets. Before applying primer, all surfaces should be cleaned thoroughly to remove grease and dust. Use a deglosser if the cabinets have a glossy finish.
Select a high-quality primer suitable for your cabinet material, whether wood or laminate. Apply the primer with a brush or roller, ensuring even coverage. For intricate areas, a small brush might be more effective.
After applying the primer, allow it to dry completely, typically around 1-2 hours, but follow the manufacturer’s instructions for specific drying times. This will create a solid base that enhances paint adhesion.
Applying Paint Evenly
When applying paint, it’s important to choose a product designed for cabinetry. A semi-gloss or satin finish is ideal, as it provides durability and easy cleaning.
Utilize a high-density foam roller for larger surfaces and a brush for corners and edges. This combination helps create an even coat and reduces visible brush strokes.
Apply the paint in thin layers, allowing adequate drying time between coats. Two to three coats may be necessary for complete coverage. Lightly sanding between coats with fine-grit sandpaper can enhance the finish and smooth out imperfections.
Ensuring Smooth Drying and Finishing
Proper drying is crucial for a flawless finish on painted cabinets. Ensure the workspace is well-ventilated to aid drying time. Avoid placing painted cabinets in humid or damp environments, as this can lead to issues like bubbling or peeling.
After the final coat of paint has dried, inspect for any imperfections or rough areas and sand them lightly as needed. Applying a clear topcoat can provide added protection and shine.
If needed, use caulk to fill any gaps or seams for a cleaner look. This step will enhance both the aesthetics and durability of the painted surface.
Reassembling and Enhancing the Kitchen
After the painting process, the next steps involve carefully reattaching the cabinet doors and hardware. Attention to detail during this phase ensures a polished look. There’s also an opportunity to enhance the overall kitchen aesthetic. Also, if it seems necessary, one can even consider adding new cabinets to increase storage and refresh the overall kitchen layout. However, before doing so, looking into how to measure cabinets properly can help ensure accurate placement and make the installation process much smoother.
Reattaching Doors and Hardware
When reattaching doors, align them properly with the hinges. It’s essential to use the original screws unless replacements are necessary. If using new screws, ensure they match the color and finish of your hardware.
Tips:
- Ensure all hardware is clean before attaching.
- Use a level to double-check door alignment.
- For intricate hardware, refer to the original placements to maintain consistency.
Make sure to tighten screws adequately to avoid sagging doors.
Styling and Maintaining Painted Cabinets
The kitchen’s appearance can be enhanced further through thoughtful styling. Adding decorative elements such as new handles, knobs, or even elegant pulls can transform the look.
Consider these elements:
- Countertops: Choose colors that complement the cabinets.
- Furniture: Incorporate chairs or tables that harmonize with the cabinet finish.
Regular maintenance is key to preserving the cabinet finish. Use a gentle cleaner and a soft cloth for routine cleaning. Avoid abrasive materials that could damage the paint. Proper maintenance ensures the cabinets remain vibrant and appealing for years.